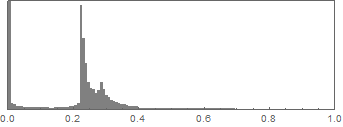
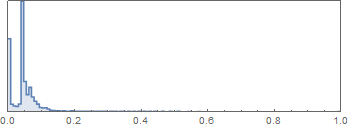
OK, here is the solution I am using.
First, it was helpful for me to realise that the source of my problems was not really the bit depth of the image, it was the color space. Moving from sRGB to RGB or Grayscale was imposing a transformation that was affecting the image histogram (making the image darker). Ultimately I need to run my image through an old third-party image processing program that requires 16-bit Grayscale images, i.e. 16 bits per pixel. But I had to go from 8-bit sRGB to 16-bit Grayscale somehow, while preserving the histogram. This requires two main steps.
1. Convert sRGB/8 to Gray/16
Code: Select all
convert im_sRGB.png -colorspace Gray -type Grayscale -depth 16 -define png:format=png16 im_Gray16.png
This gives the right color space and bit depth, but a darkened image (as rendered by the third-party program).
2. Re-build the histogram
Each pixel in the sRGB/8 image contains three bytes, one each for the red, green and blue channels. My images are all greyscale, so each of these channels has equal intensity. Therefore I can focus on, say, the red channel alone. At each pixel in the sRGB/8 image I determine the red intensity and I then apply that intensity to the corresponding pixel in the Gray/16 image. I do this programmatically using MVG scripting. For example, assuming pixel (19,19) in sRGB/8 image has red intensity 65, then I can issue the following MVG commands to set the correct gray intensity for the corresponding Gray/16 pixel:
Code: Select all
fill gray(65)
rectangle 19,19 20,20
I have to do this for each pixel in the image, which means it is most efficient to aggregate all such MVG pixel commands into a file (call it histo.mvg) and apply them all at once with a single command line execution.
Code: Select all
convert im_Gray16.png -define png:bit-depth=16 -draw @histo.mvg im_Gray16histo.png
Hey presto, I have the right colorspace, the right bit depth, the right number of bits per pixel, and the right histogram. And the third-party program reads and renders the file beautifully.
Of course, step 1 could be replaced by creating a simple blank canvas in Gray/16 format and re-constructing the image content using step 2, but it is instructive for me to do the transformation to be able to compare the before and after versions in each step.
Many thanks to all who posted with tips and advice, helping me learn and organize my thoughts.
Cheers,
4Shades


