Page 1 of 1

How can I fix the corners of the image and remove white space

Posted: 2016-07-14T04:47:18-07:00
by ahmed
How can I fix (stretch outside) the corners of the image and remove white space.

Here is my demo image.
Image

Re: How can I fix the corners of the image and remove white space

Posted: 2016-07-14T08:34:10-07:00
by snibgo
You can trim off the white to the bounding rectangle of the shape:

Code: Select all

code in.jpg -fuzz 5% -trim +repage out.png
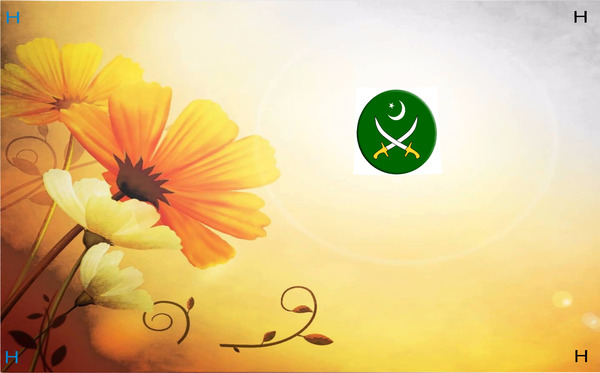
If you then want to stretch the shape to fit the rectangle, I show methods on my "Shape to shape" page. For example, (resized for the web):

Image

However, the method uses my process modules cumulhisto and invclut.

Re: How can I fix the corners of the image and remove white space

Posted: 2016-07-14T22:39:34-07:00
by ahmed
The code you gave is not working exactly as you paste the image.
I think the code you gave is only for remove white spaces.

Image

Re: How can I fix the corners of the image and remove white space

Posted: 2016-07-14T22:56:27-07:00
by snibgo
I showed a command that only trims the white border.

If you also want to stretch the image, see my page "Shape to shape". The image uses code from that page. (And that code needs my process modules.)

Re: How can I fix the corners of the image and remove white space

Posted: 2016-07-27T03:41:58-07:00
by snibgo
I have devised another method for horizontally stretching a shape into its bounding rectangle. This method doesn't use my process modules, but takes longer than the previous method (15 seconds versus 9 seconds for this image).

The method is:

1. Make an identity absolute displacement map the size of the rectangle.

2. Mark as blue the pixels near the right and left edges that are outside the shape.

3. Crop into lines. Trim any blue from the ends of each line. Resize all lines to the full width. Append the lines vertically.

4. Now we have an absolute displacement map that transforms the shape into the bounding rectangle. Apply this map.

Windows BAT syntax, IM v6:

Code: Select all

set SRC=itWGqb5.jpg

%IM%convert %SRC% -fuzz 5%% -trim +repage s0.png

set UNUSED_COL=Blue

%IM%convert ^
  s0.png ^
  -bordercolor White -border 1 ^
  -fuzz 5%% ^
  -fill %UNUSED_COL% ^
  -draw "color 0,0 floodfill" ^
  -shave 1 ^
  +write s1.png ^
  -fill White +opaque %UNUSED_COL% ^
  -fill Black -opaque %UNUSED_COL% ^
  mask.png

rem (Uses s0.png and mask.png from first method).

for /F "usebackq" %%L in (`%IM%identify ^
  -format "WW=%%w\nHH=%%h\nWm1=%%[fx:w-1]\nHm1=%%[fx:h-1]" ^
  s0.png`) do set %%L

set EDGE_COL=blue

%IM%convert ^
  mask.png ^
  ( -clone 0 ^
    -sparse-color bilinear ^
0,0,#000,^
%%[fx:w-1],0,#f00,^
0,%%[fx:h-1],#0f0,^
%%[fx:w-1],%%[fx:h-1],#ff0 ^
  ) ^
  ( -clone 0 ^
    -fill %EDGE_COL% -colorize 100 ^
  ) ^
  -swap 0,2 ^
  -compose Over -composite ^
  +write idAbsMap.png ^
  -crop x1 +repage ^
  -bordercolor %EDGE_COL% -border 1 ^
  -trim +repage ^
  -resize "%WW%x1^!" ^
  -append ^
  stretchMap.png

rem Apply the stretched absolute displacement map.

%IM%convert ^
  s0.png ^
  s2s_cent_relmapinv.png ^
  -compose Displace ^
  -set option:compose:args %Wm1%x0 -composite ^
  stretched2.png

rem Make a version for the web.

%IM%convert ^
  stretched2.png ^
  -resize 600x600 ^
  stretched2.jpg
The result, stretched2.jpg, is as before.

I expect it could be collapsed into a single "identify" and single "convert" in v6, or just one "convert" in v7.