Page 1 of 1

Alleviating Raw Photo Processor X-Trans conversion artifacts

Posted: 2016-09-07T18:32:48-07:00
by marcomastri
Hello,

To develop raw files from my Fuji mirrorless camera I’m using Raw Photo Processor, a raw converter based on dcraw. It works quite well, but it uses an older algorithm which leaves jagged artifacts, especially visible on high contrast areas (see https://dl.dropboxusercontent.com/u/662726/test.jpg).

This is what I tried to mitigate the effect:

A median filter on the luminosity channel:

Code: Select all

convert test.jpg -colorspace LAB -separate test-%d.jpg
convert test-0.jpg -median 3x3 test-0-median.jpg
convert test-0-median.jpg test-1.jpg test-2.jpg -set colorspace LAB -combine -set colorspace sRGB test-combined.jpg
A median filter applied only on the edges:

Code: Select all

convert test.jpg -colorspace gray -edge 1 -negate test-mask.jpg
convert test.jpg -median 3x3 test-median.jpg
convert -size 3288x4952 tile:test.jpg tile:test-median.jpg test-mask.jpg -composite compo.jpg
None of the two attempts was good enough, though. I’m very new to ImageMagick and this is the first time I use the command line to edit images. What can I try to improve the situation? I’m using version 6.9.5-3

Thanks everybody
Marco

Re: Alleviating Raw Photo Processor X-Trans conversion artifacts

Posted: 2016-09-07T18:46:26-07:00
by fmw42
Sorry, I am not a photographer. But would it not be better to save files in some non-lossy compression format (PNG or TIFF)? But certainly do not save intermediate images in JPG format.

Try the following. I do not know if the new changes are worse than the fixes to the jaggies.

Code: Select all

convert test.jpg -morphology open diamond:1 test_open.png
See http://www.imagemagick.org/Usage/morphology/#close

Re: Alleviating Raw Photo Processor X-Trans conversion artifacts

Posted: 2016-09-08T02:07:52-07:00
by snibgo
As Fred says.

JPEG is a useful format for photos after you have done all your processing, as files are quite small and any software can read it.

For any other purpose it is terrible. It is like taking beautiful photos with a film camera, then throwing the unprotected negatives into a drawer stuffed with pens and paper-clips, and wondering how to make good prints from those scratched negatives.

Taking a close look:

Code: Select all

convert ^
  tower.jpg ^
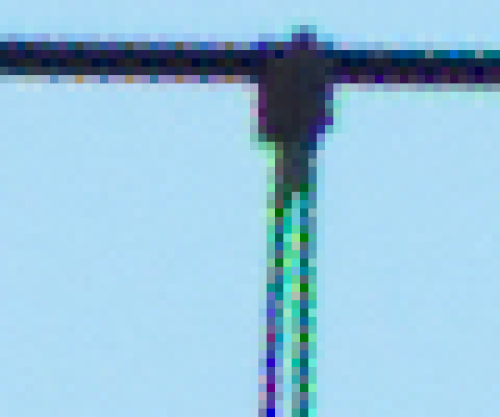
  -crop 60x50+1953+2173 +repage ^
  -scale 500% ^
  tower_part1.png
Image
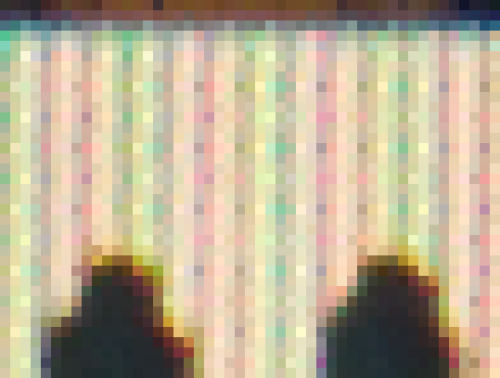
The green/magenta colours in the vertical cable are probably from the de-bayer (interpolation) method. But the roughness in edges of the horizontal cables is probably from JPEG compression (although it repeats every 6 pixels, which is unusual). It also occurs in the white or yellow edges of the tower.

Code: Select all

convert ^
  tower.jpg ^
  -crop 48x18+1476+1116 +repage ^
  -scale 500% ^
  tower_part2.png
Image
Removing the damage done by JPEG is impossible. Removing some obvious damage done by JPEG may be possible, with a number of techniques. But it's better by far not to do the damage in the first place.

Incidentally, diagonal lines don't show the 6-pixel problem. This isn't the common "staircase" jaggies.

I suggest you try alternative de-bayer algorithms, and never ever use JPEG again.

UPDATE: Ah, I see your camera is the X-Pro1, which uses a pattern that repeats every 6x6 pixels. So the 6-pixel roughness probably comes from the de-mosaicing, not JPEG.

I suggest you try dcraw, and see if that does a better job.

Re: Alleviating Raw Photo Processor X-Trans conversion artifacts

Posted: 2016-09-08T04:11:06-07:00
by snibgo
The X-Pro1 has been out for long enough that I expect good demosaic software is available. It not, then here are some thoughts.

In this image, problems occur at vertical and horizontal edges, but not diagonal edges. There are two obvious problems:

1. A repeating pattern of false tone (and false colour but to a lesser degree) every 6 pixels.

2. False colours (green and magenta) of the dark cables and fencing that are only one pixel thick.

Code: Select all

convert ^
  tower.jpg ^
  -crop 49x37+960+4188 +repage ^
  -scale 500% ^
  tower_part3.png
Image
(1) is quite easily solved: at horizontal edges, blur horizontally with radius=3. Likewise vertically.

(2) is also easily solved (just desaturate the colour) but first we need to identify where the problem occurs. That's difficult.

EDIT: I've read that the in-camera JPEGs from the X-Pro1 are good. So, to identify where problem (2) occurs, compare your demosaiced image with the JPEG. If the demosaiced image has a strong colour where the JPEG is more neutral, desaturate the demosaiced.